Yes, by using badges you create an opportunity to emphasise or identify certain services.
In principle, badges can be displayed as visual labelling for every product on the homepage of your partner shop. [1]

To do this, switch to your Partnershop backend – CMS / Content / Pages / Product. [2]
Select the desired product in the left navigation under Page. [3]
Go to the ‘General Page Data’ component [4] and open it. [5]

Scroll to the ‘Badge’ area [6] and select the desired type. [7]

There are various types of badges to choose from.
- None
- free Text
- blue angel
- nature paper
- nature paper transparent
- 24h
- 24h transparent
Option „Free Text“
You can make the following changes to this selection.
- Free Text
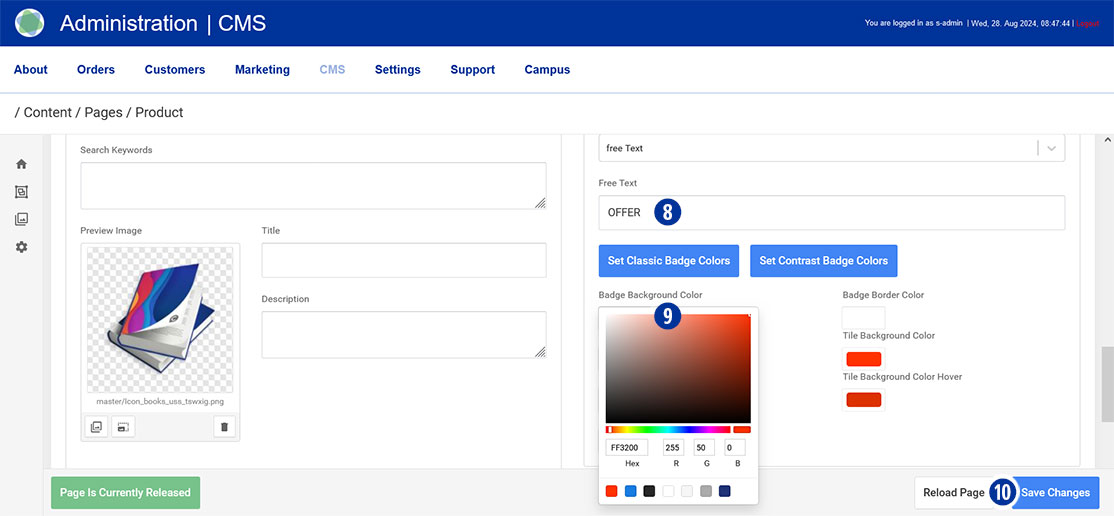
Enter the desired badge text in the input field. [8] - Badge Color
Specify the desired badge colours. Click in the respective input field. [9] Select the desired colour from the colour palette displayed. Close the palette by clicking next to it. Cancel the colour selection by clicking on the icon.
Alternatively, you have the option of using predefined badge colours. To do this, click the ‘Set Classic Badge Colours’ or ‘Set Contrast Badge Colours’ button.
Save your changes by clicking on the ‘Save Changes’ button. [10]
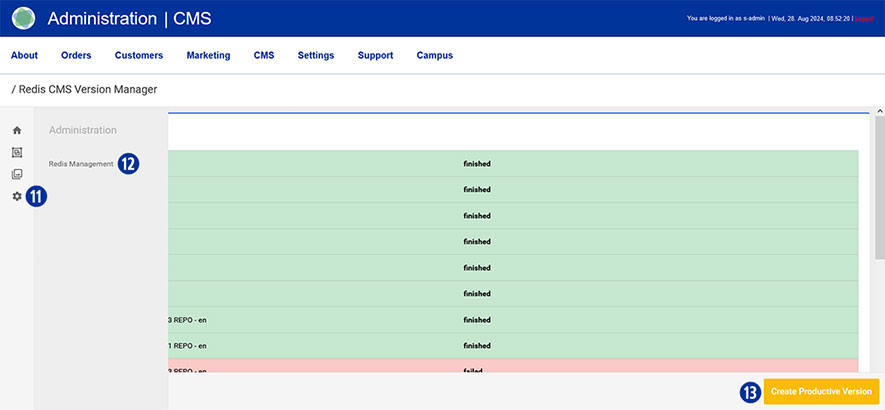
After completing all changes, switch to your Partnershop backend – CMS / Administration / Redis Management / Exports. [11][12]
Click the ‘Create Productive Version’ button. [13]