Yes, you can define your own number ranges.
To do this, proceed as follows.
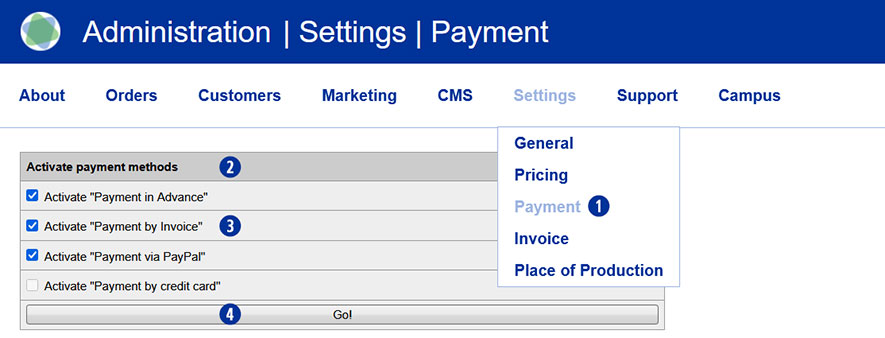
Go to the Partnershop backend – Settings / Invoice.
Navigate to the ‘Invoice Number range’ module.
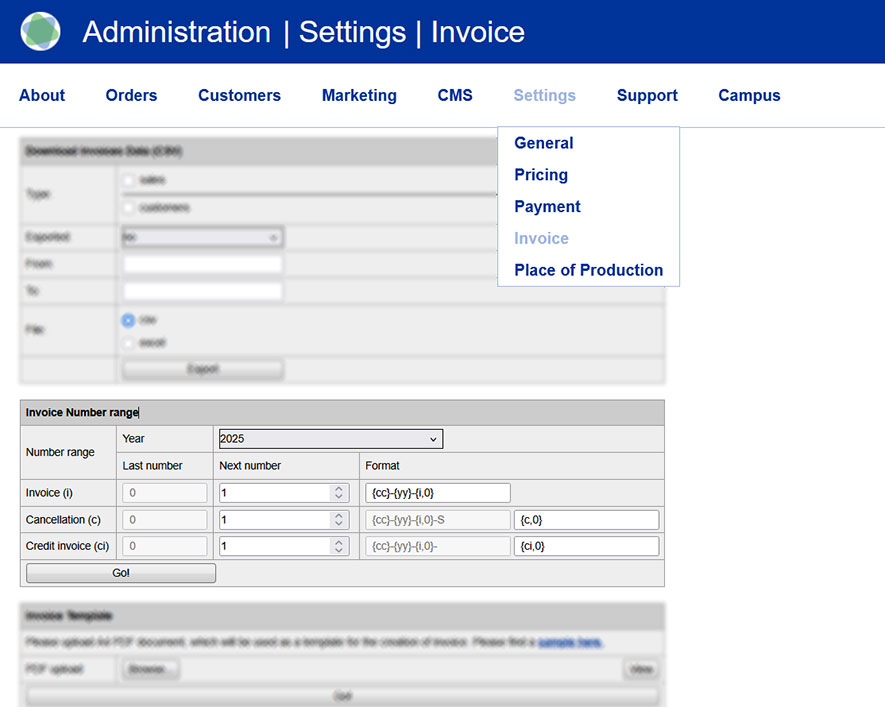
Via the modul ‘Invoice Number range’ [1] you can make inputs and enter your own number codes [2] for invoices [3], cancellations [4] and invoice credits [5].
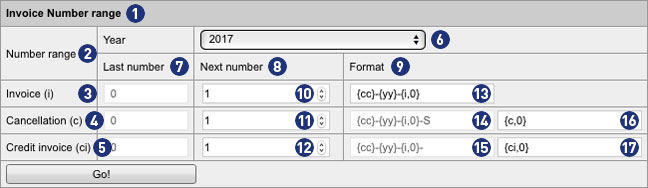
The displayed view always refers to the year selected by the combobox “Year” [6]. Alternatively, you can use this selection box to display settings for the previous year or the following year, make changes, and edit your own number ranges.

The fields in the column “Last number” [7] indicate how many invoices, cancellations and credits invoices were generated in the currently selected year [6]. The values are gray and can not be changed.
The fields in the columns “Next number” [8] and “Format” [9] can be customized in the “Invoice” line. The values are black and can be changed.
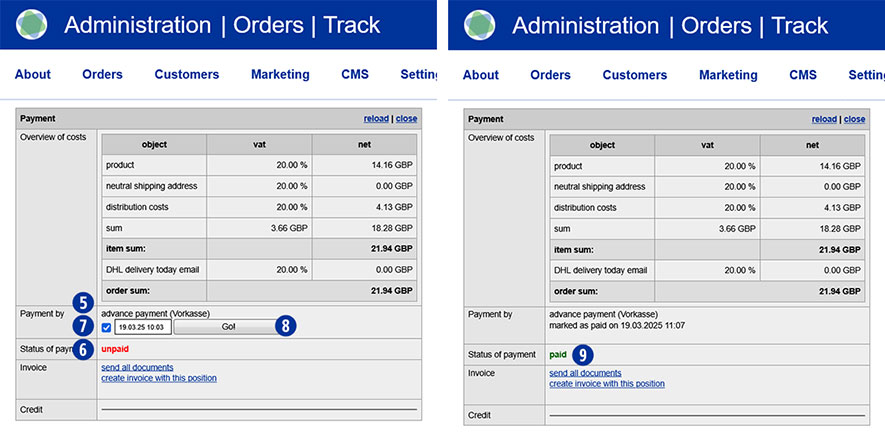
In the input field [10] you define a value (for example, 4). This determines that the next invoice generated by the backend will be given this number. Similarly, the numbering continues for each successive calculation (e.g., 5, 6, etc.).
Note
The entered value in field [10] is only valid if it is greater than the displayed value in the field “Last number” (In the example: 4 > 3).
In the input field [13], you define how the invoice number is to be displayed. You can define a prefix to prepend the invoice number. It is possible to specify a minimum length of the invoice number (without prefix).
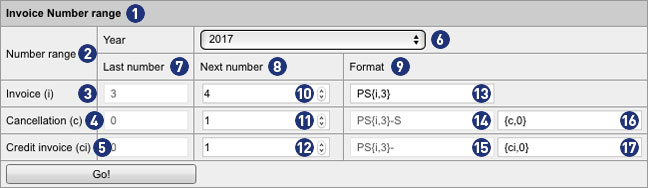
In our example, the following individual adjustments have been made.
In the field [13], the prefix “PS” has been added and the value 0 in the brace has been changed to 3.
In the example PS{i;3} the next invoice generated by the backend would be: PS004.
PS = Prefix
004 = Invoice number with a minimum length of 3 digits and leading zeros
4 becomes 004, 44 becomes 044 and 444 becomes 444. Since it is a minimum length, longer numbers remain unchanged: 4444 remains 4444.
A detailed explanation of the possible formats can be found later in the text.
Note
The adjustments made in field [13] are also transferred to the fields [14] and [15] via the button “Go!”.
The same algorithm applies to cancellations and credit invoices. By default, their numbering starts with the value 1. Unless otherwise specified, a different value is defined in field [10].
For cancellations, the invoice number is generated with the suffix “-S” plus the consecutive number.
In the example PS{i;3}-S {c;0} the next reversed cancellation created by the backend would be represented as follows: PS003-S1.
PS = Prefix
003 = Previous invoice number with a minimum length of 3 digits and 2 leading zeros
-S = Suffix for Cancellation
1 = Consecutive number without leading zeros
For credit invoices, the invoice number is generated with the suffix “-” plus the consecutive number.
In the example PS{i;3}- {ci;0} the next credit note created by the backend would be represented as follows. PS003-1.
PS = Prefix
003 = Previous invoice number with a minimum length of 3 digits and 2 leading zeros
– = Suffix for credit invoice
1 = Consecutive number without leading zeros
Note
The entries must not contain any umlauts or empty spaces.
The possible variables within the curly brace in field [13] are replaced by real values when the invoice is generated.
The gray text fields in format format [14] and [15] are inactive and can not be changed. For both fields, the format specified in field [13] applies.
If there are no entries for the current year, a number range with the format of the last year and the value for “Next number” for all invoice types is automatically set to 1. If no entry is found for the previous year, a default number range is generated.
Important
The prerequisite for an error-free billing – even beyond the turn of the year – is that in the field [13] an invoice number format with year {yy} or
{yyyy} is used.
Failure to do so creates duplicate records. The result is faulty invoices, which can not be processed and sent.
Notes for the formatting in the input fields
{yyyy} Year with 4 digits | Ex.: 2017
{yy} Year with 2 digits | Ex.: 17
{mm} Month with 2 digits | Ex.: 06
{dd} Day with 2 digits | Ex.: 28
{qq} Quarter with 2 digits | Ex.: 02
{i,n} Digit {i} with leading zeros {n} | as a 3-digit number with 2 leading zeros {i,3} | Ex.: 003
{c,n} Digit {c} with leading zeros {n} | as a 3-digit number with 2 leading zeros | Ex.: 003-S1
{ci,n} Digit {ci} with leading zeros {n} | as a 3-digit number with 2 leading zeros | Ex.: 003-1


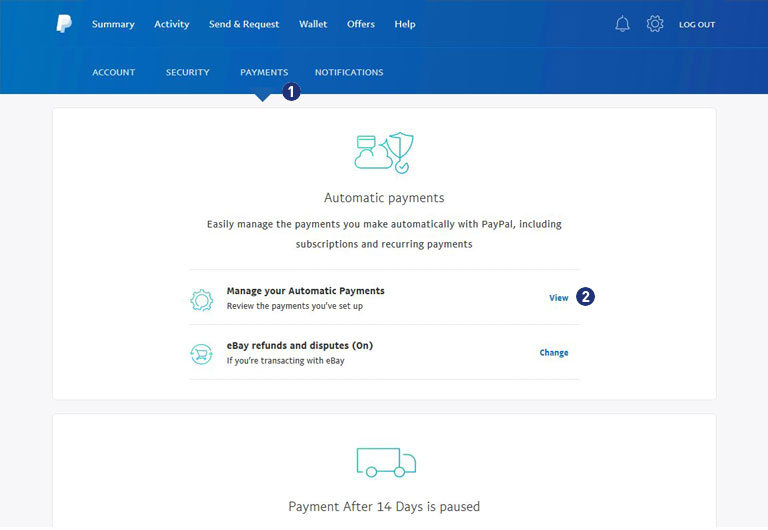
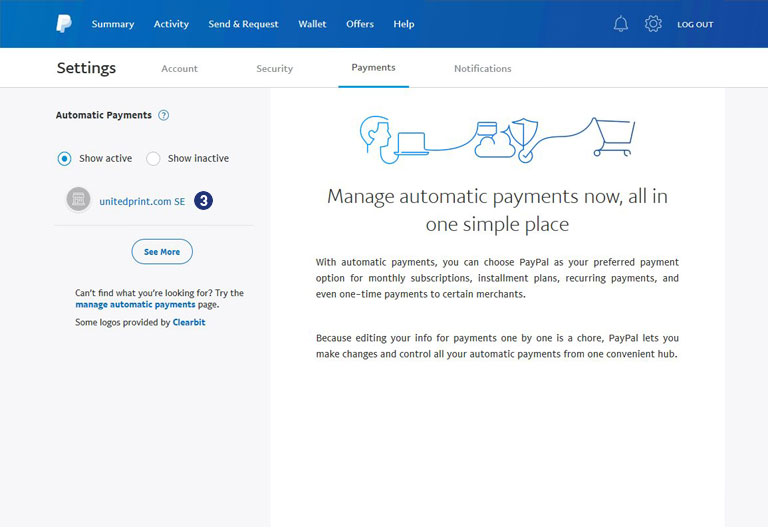
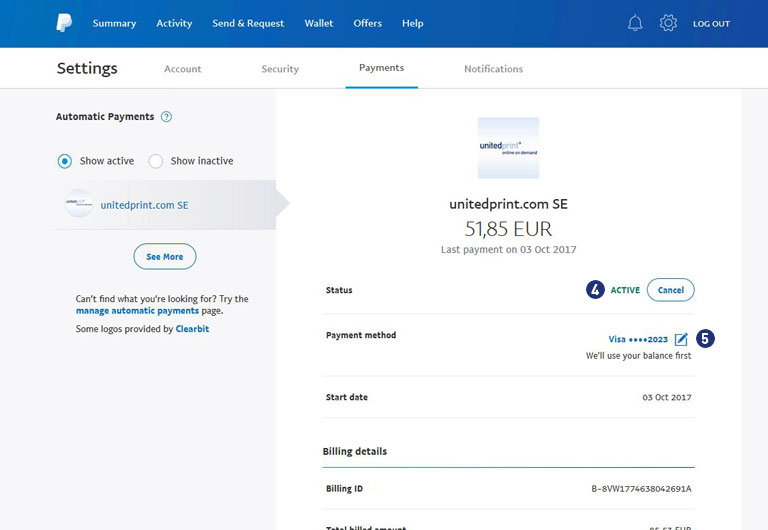
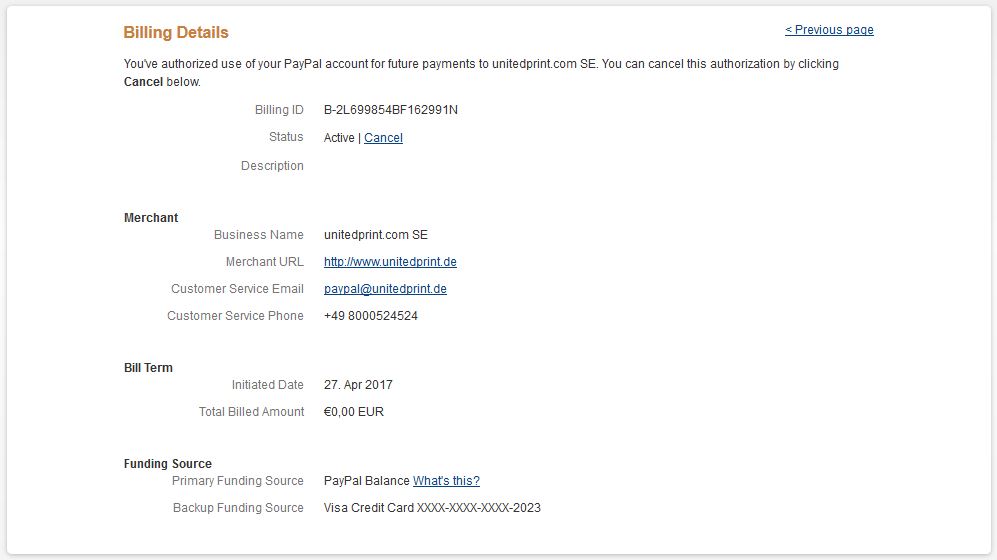
 Bestätigen Sie in der Ansicht „Abrechnungsdetails“ Ihr PayPal Mandat für „unitedprint.com SE“. [3] Der Status muss dabei “Aktiv” anzeigen.
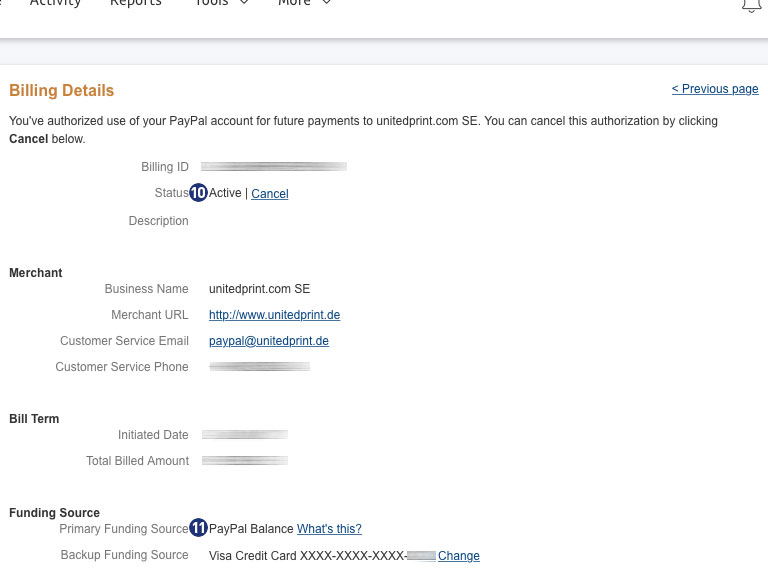
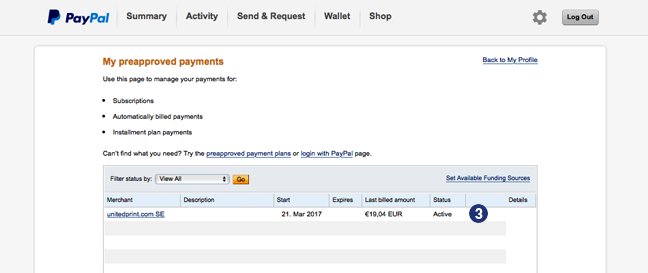 Klicken Sie auf „unitedprint.com SE“ und prüfen Sie in den „Abrechnungsdetails“ ob unter dem Punkt „Zahlungsquelle“ -> „Alternative Zahlungsquelle“ Ihre Kreditkarte (Beispiel VISA-Kreditkarte) eingetrage ist.