Go to your Partnershop backend – CMS / Media / Media Upload. [1] [2]
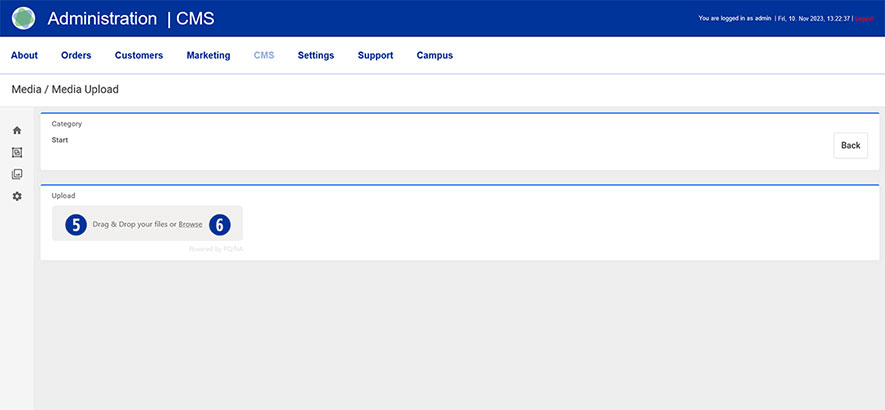
Select Category / Start [3] in the left navigation and click the “Upload” button on the right. [4]

Drag at least two or three home page banners (*.SVG or *.PNG) onto the gray area “Drag & Drop your files…” [5] or click the “Browse” link [6] and select the desired files out of.
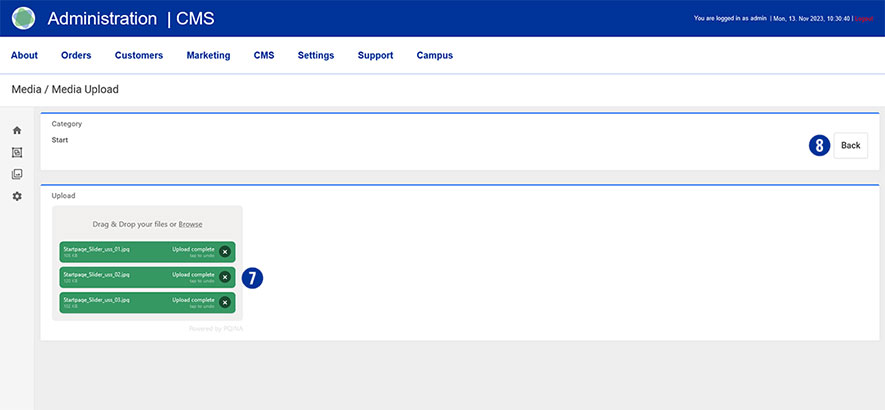
The successful upload process is displayed on the left in the form of the file name in a green button. [7] Click the “Back” button on the right. [8]
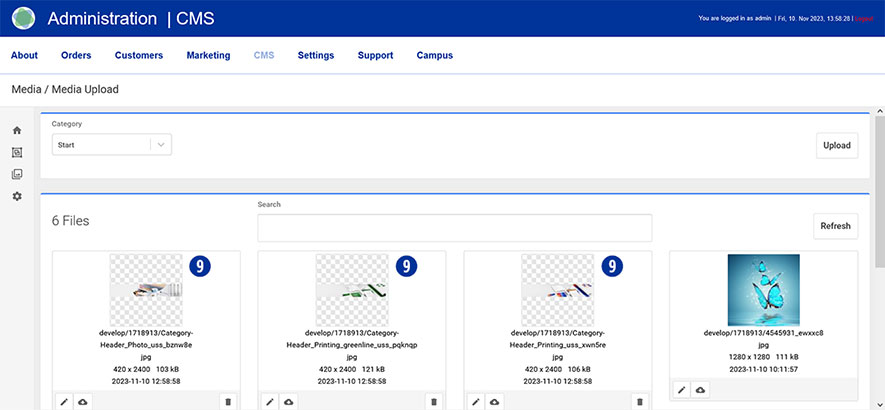
The uploaded images are displayed in the overview. [9]
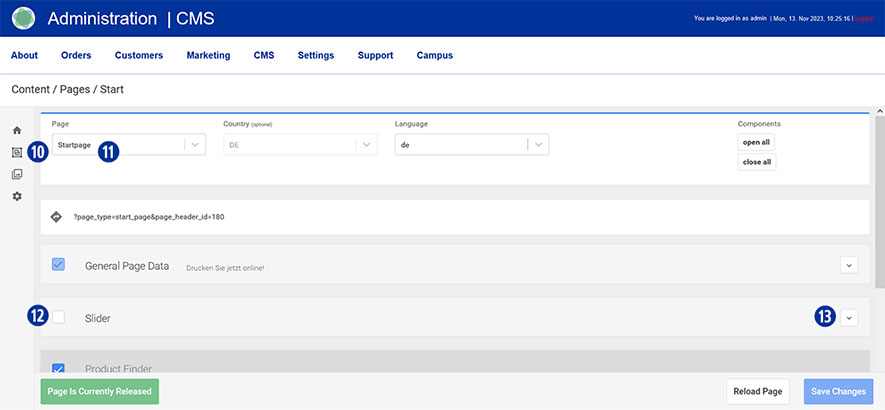
Switch to the area using the navigation (left) Content / Pages / Start. [10] You are here Page / Startpage. [11]
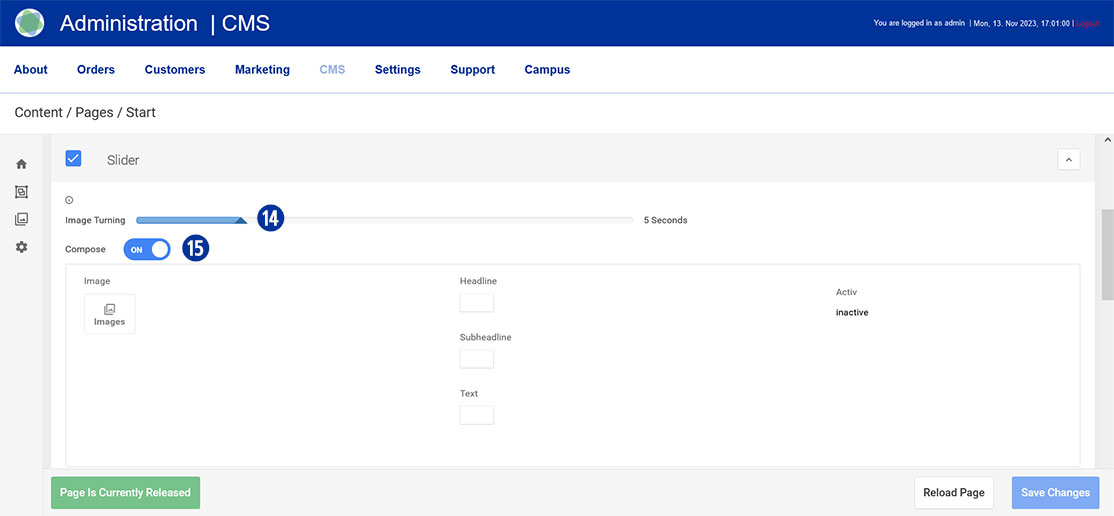
Scroll to the “Slider” tab, click on the checkbox to activate [12] and open it. [13]
Move the slider under “Image Turning” [14] to the right or left to determine the time for a horizontal change of the home page banner. A value between 1 and 20 seconds is possible.
Under “Compose” drag the slider to “ON”. [15]
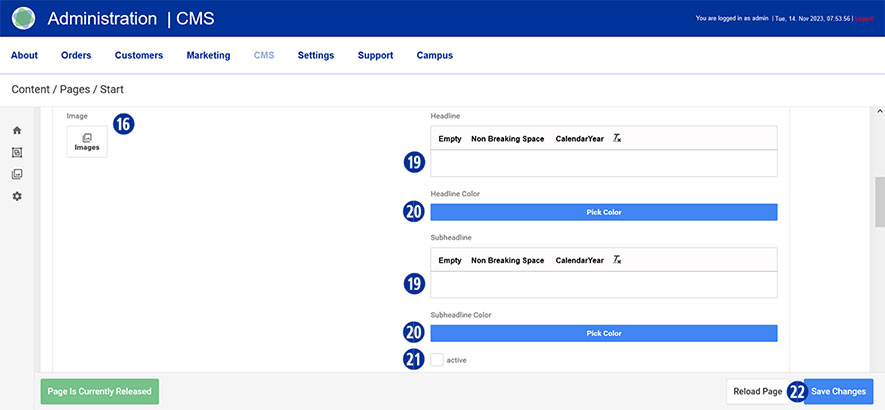
Select the first uploaded homepage banner under “Image”. To select an image, click the “Images” icon. [16]
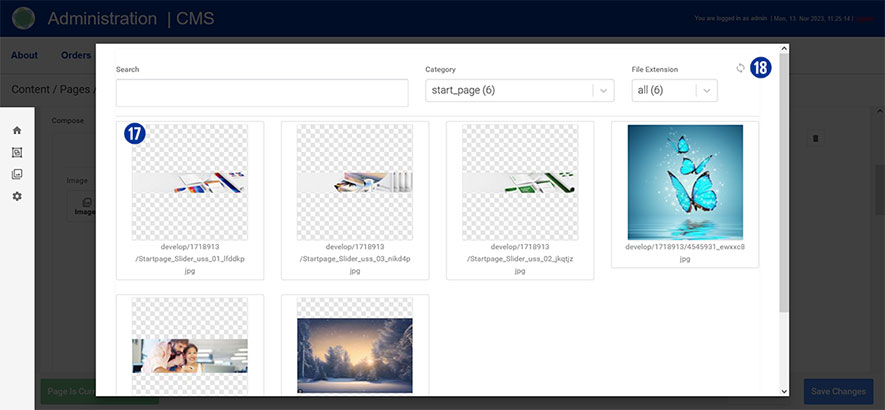
You will be shown an overview of the uploaded files. [17] Optionally, update the view using the “Update” icon at the top right. [18]
Enter the desired text in the “Headline” and “Subheadline” input fields. [19]
Optionally select a text color by clicking on the “Pick Color” button. [20]
Activate the input by clicking on the “active” checkbox. [21]
Repeat the process for additional homepage banners below.
Save your changes by clicking on the “Save Changes” button. [22] Close the “Slider” tab. [13]
Note
Please pay attention to the following technical specifications when creating your home page banner.
- Image size 5120 x 1520 Pixel with 72 dpi
- Save as a web-optimized JPEG file
- Background color of the sliders HEX F0F0F0
File names must not contain umlauts or spaces.
To create further sliders, please use only the Photoshop template below.
Download
Slider_Template.zip