Use the “Media Upload” option to update existing image material (e.g. home page banners/sliders). This eliminates the need to edit content via the Content / Pages area.
Ensure that the new images meet the technical requirements and are identical in terms of file naming. Check the required image sizes and resolutions of the new images. Adapt the new image material if necessary.
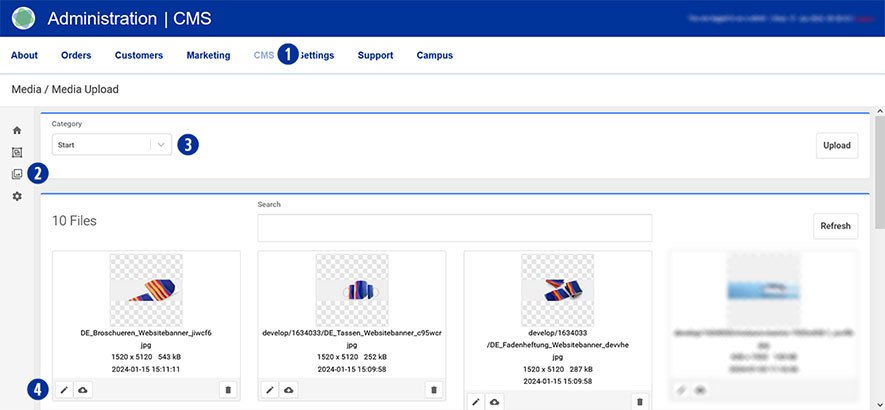
To do this, go to your Partnershop backend – CMS / Media / Media Upload. [1] [2]
To update, e.g. the start page banner/slider, select Category / Start in the left-hand navigation. [3]
Select the image to be updated and click on the “Edit” icon. [4]
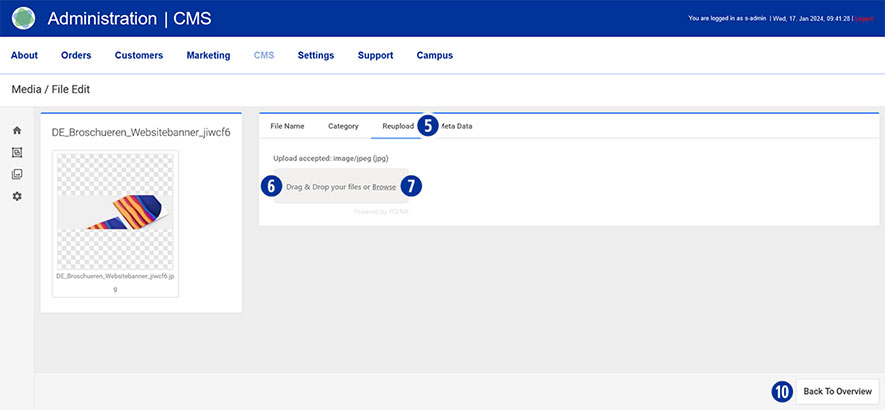
In the next step, click on the “Reupload” tab [5].
Drag the corresponding file of the start page banner/slider (*.SVG or *.PNG) onto the greyed-out area “Drag & drop your files…” [6] or click on the “Browse” link [7] and select the desired file.
Wait until the process is complete and a layer with the message “Success! File changed!” is displayed. Click the “Ok” button or close the layer. [8]
The successful upload process is also displayed in the form of the file name in a green button. [9]
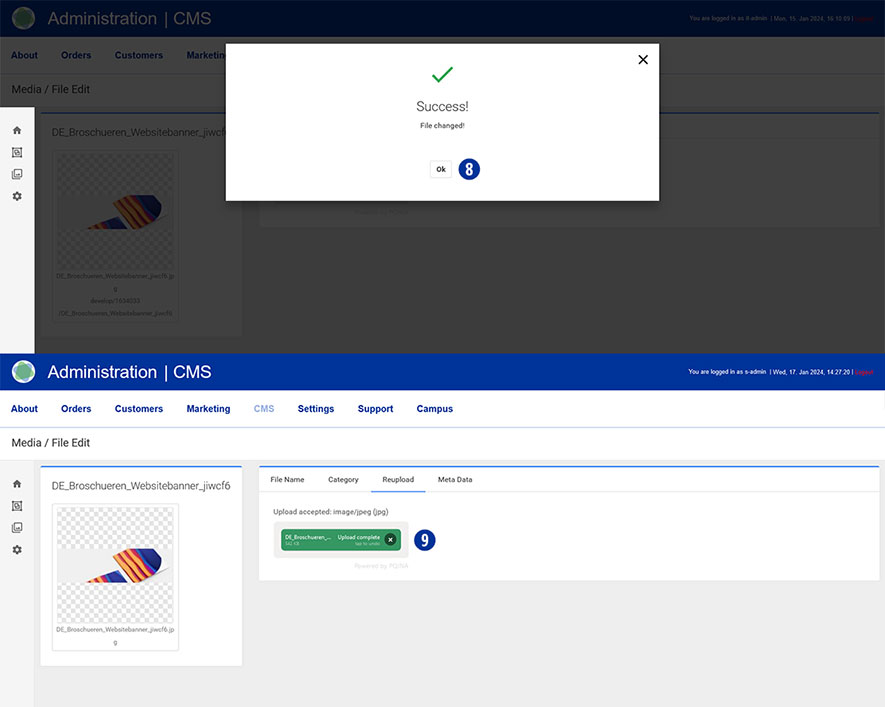
Click the “Back To Overview” button at the bottom right. [10]
The uploaded image is displayed in the overview.
Note
The updated image of the start page banner/slider will be displayed the next time the start page of your partner shop is called up.